Hotspot Setup
Overview
In order to get the most out of DMR having a hotspot is key. I chose to go with a duplex hotspot to be able to take advantage of two timeslots. The instructions provided may not work exactly for all types of hardware.
Parts
- Raspberry Pi 4 (2GB, 4GB, or 8GB)
- Raspberry Pi 4 Power Supply
- 16GB microSD Card
- Raspberry Pi 4 Case w/ Fan & Heatsinks
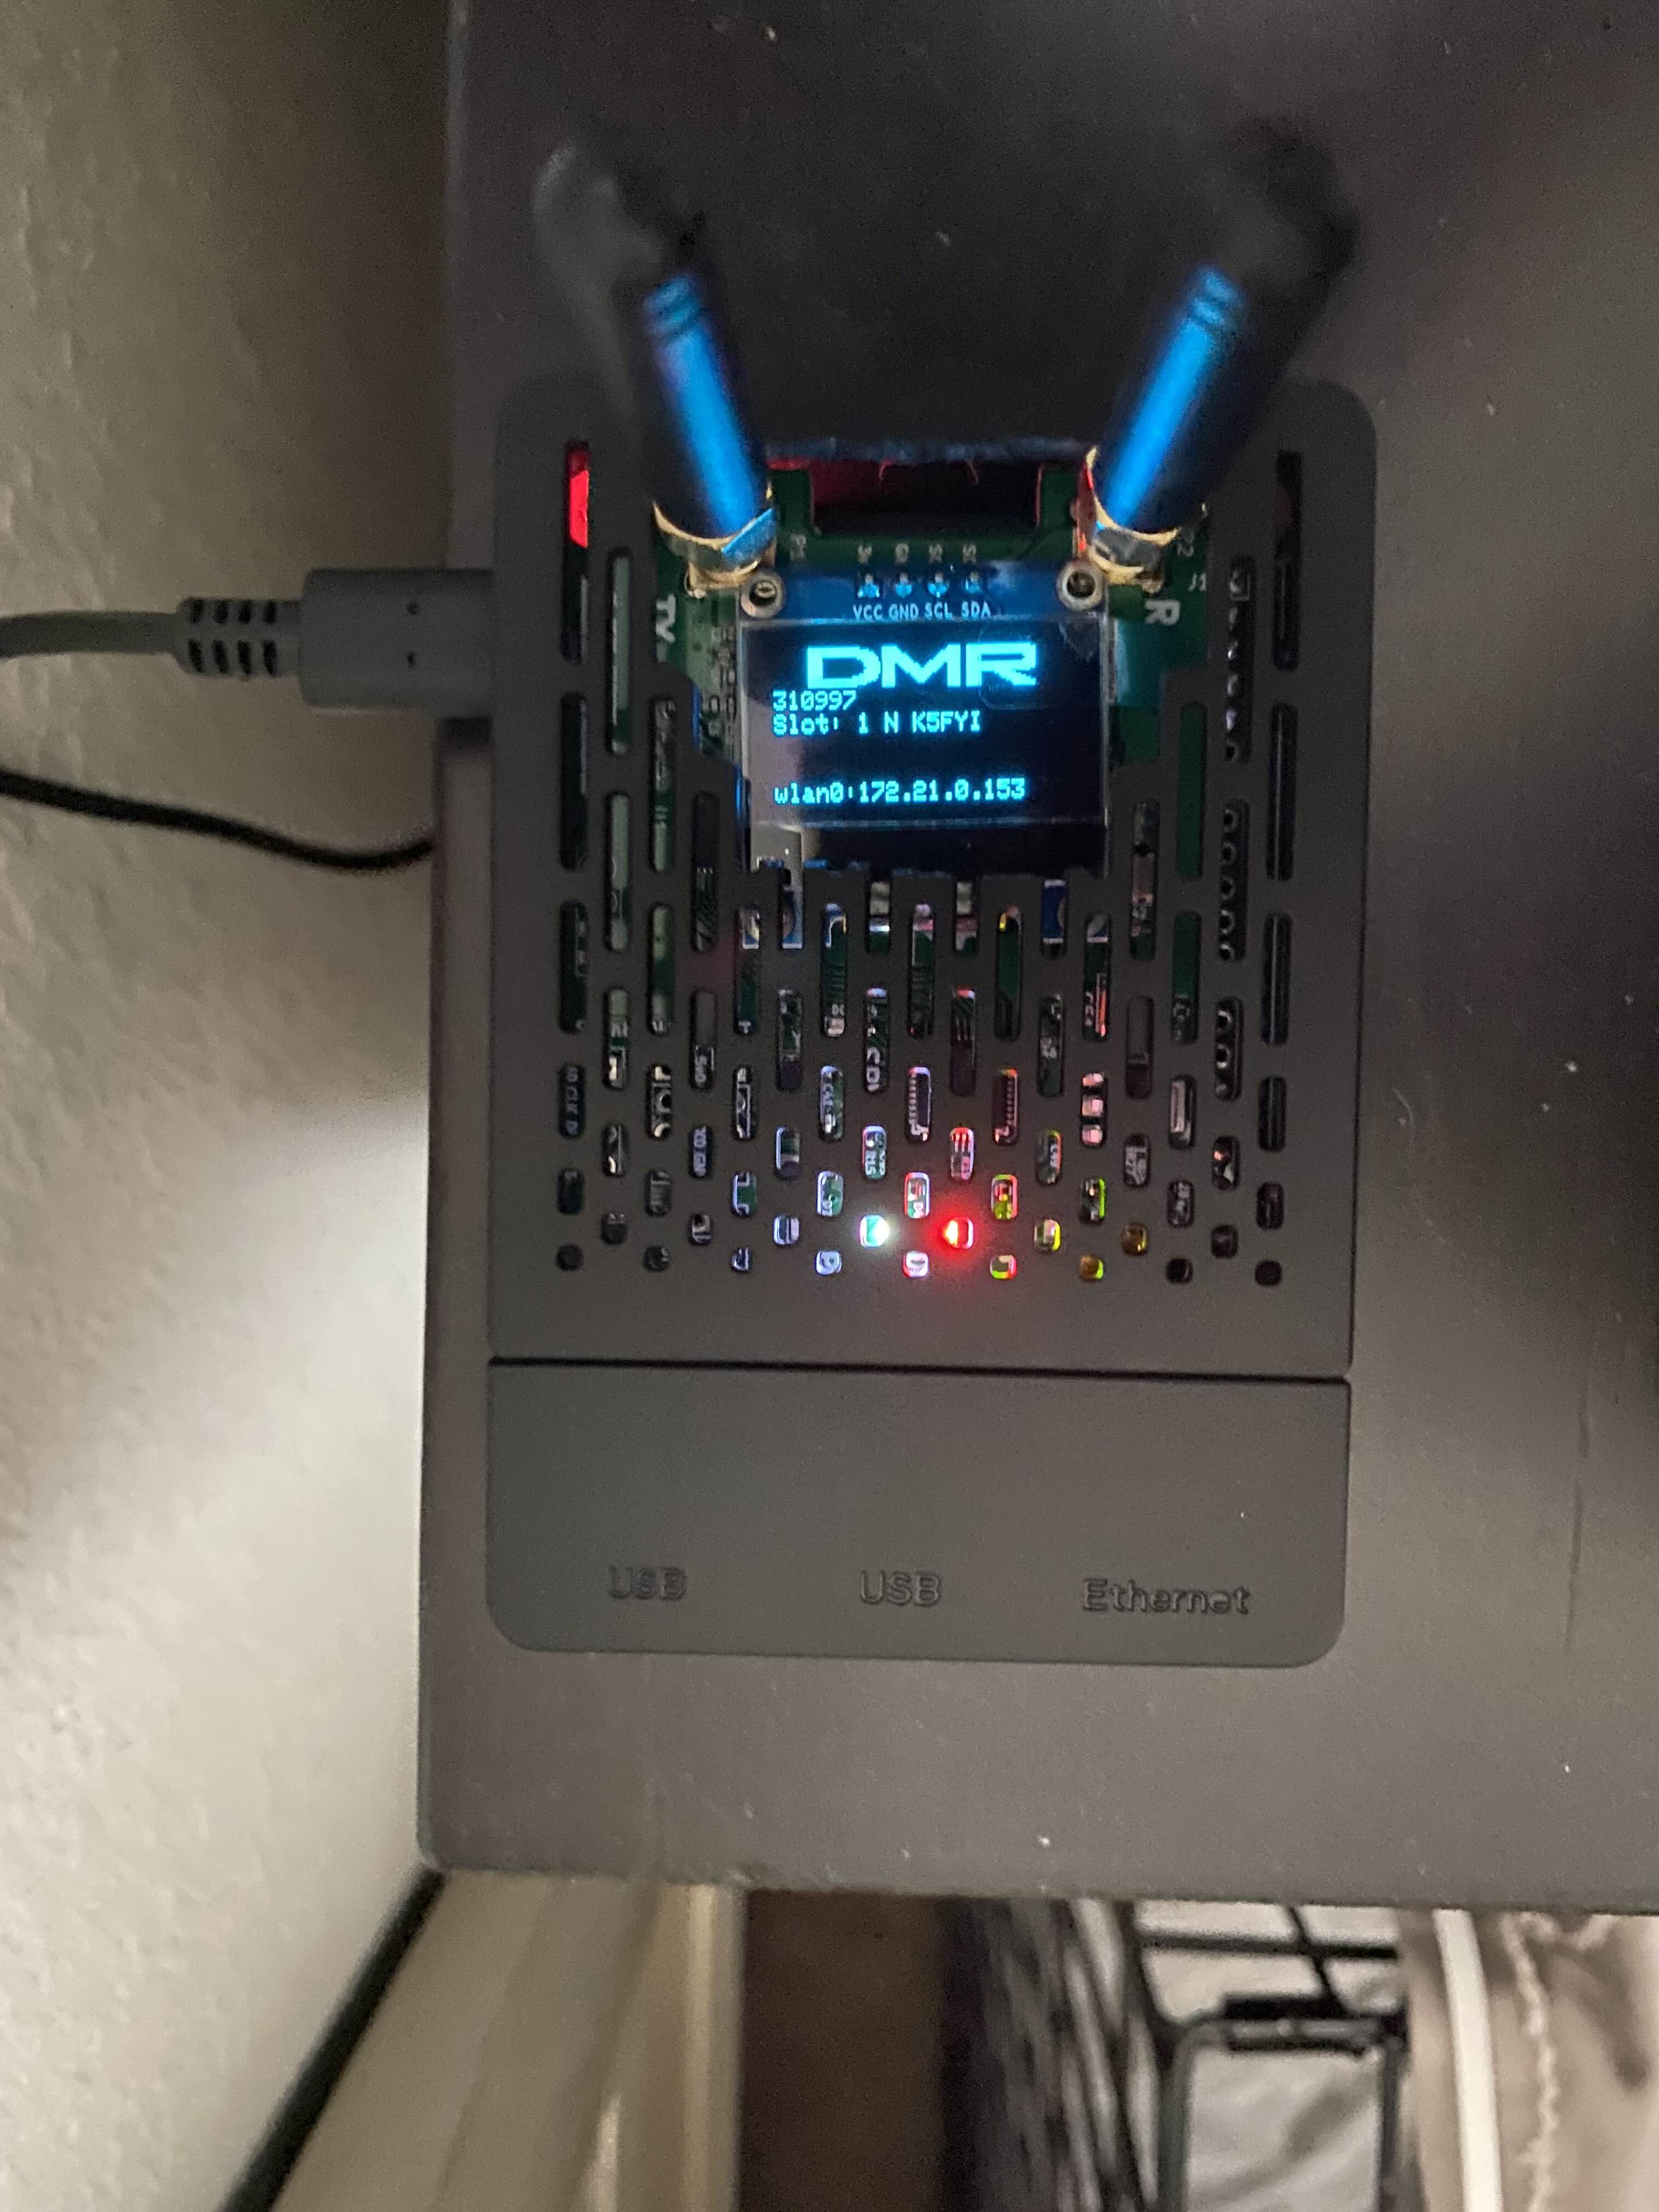
- Duplex MMDVM Hat w/ OLED Screen
Tools
- Philips-head Screwdriver (one of these came with my Pi Case)
- Soldering Iron (for upgrading the MMDVM hat firmware, or when using a fan, which is highly recommended with the Pi 4)
- Snips/Diagonal Cutters (for trimming the case cover)
Prerequisites
- A DMR radio configured for the hotspot frequencies and color code (configured later). See my documentation for configuring the Radioddity GD-77 with OpenGD77.
- Register and apply for a DMR ID via radioid.net.
- Register a BrandMeister account and configure hotspot security. Make sure to select
Chinese Radiofor Brand if using the GD-77.
Assembly
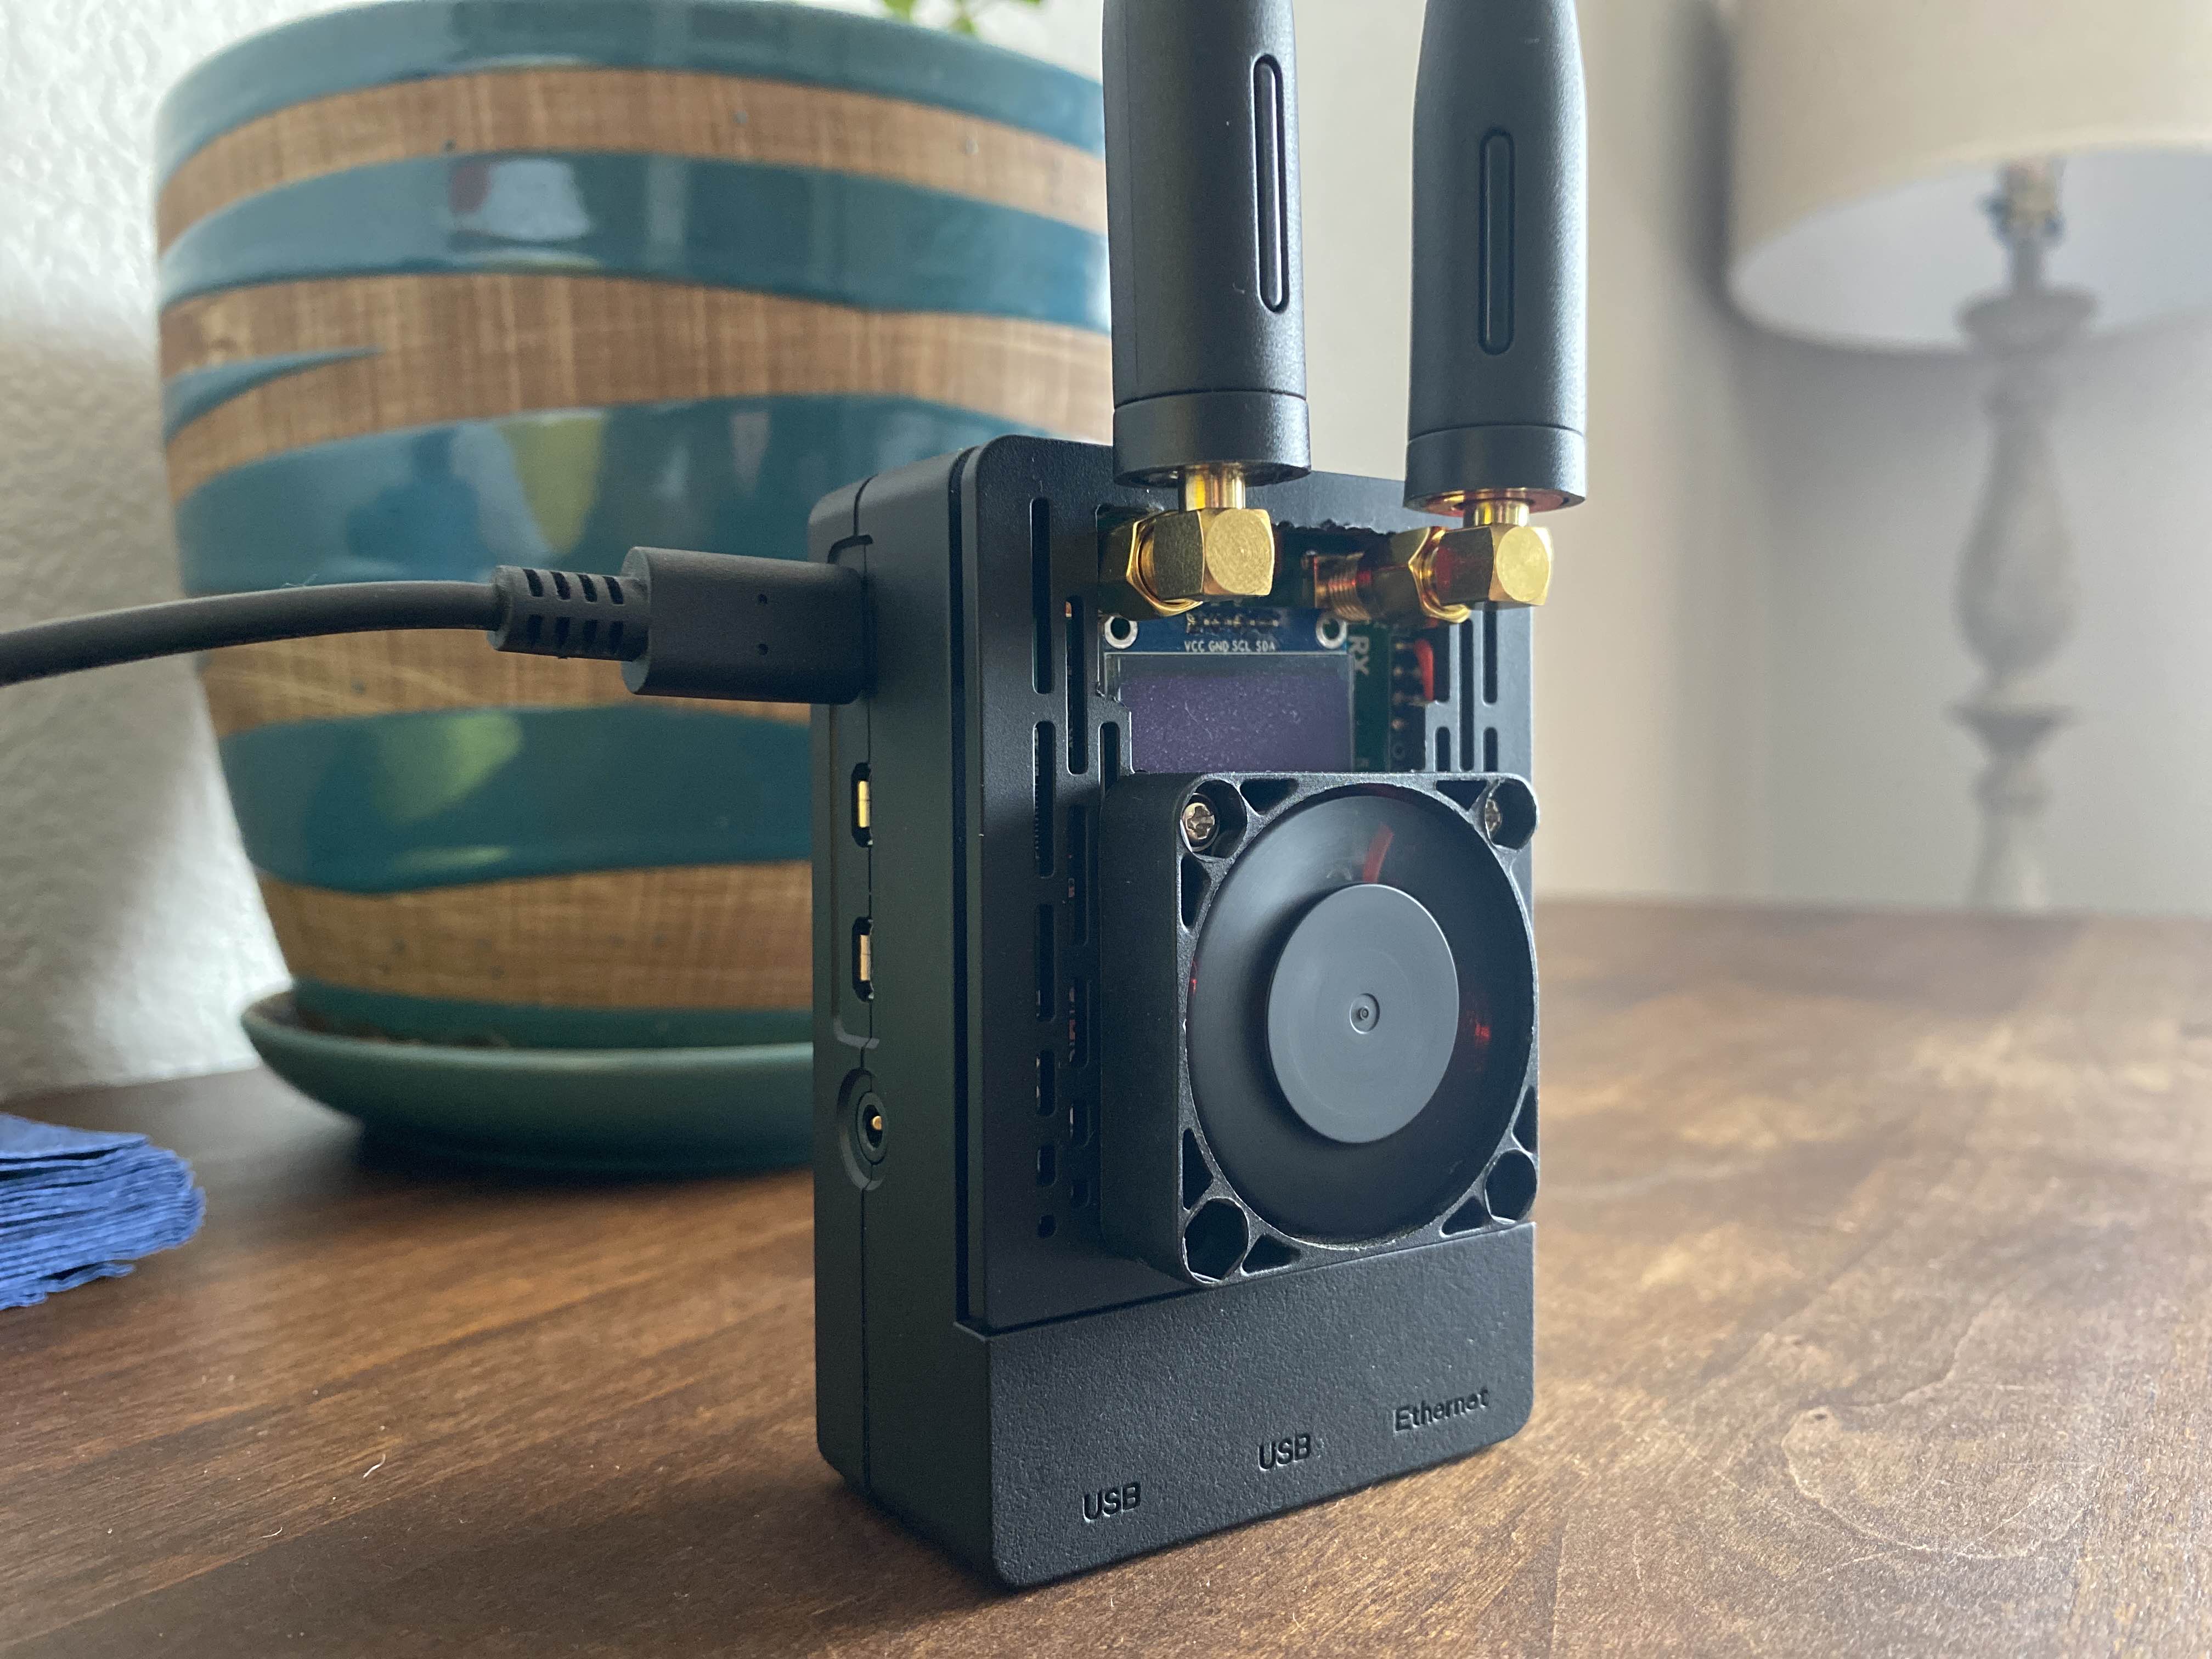
- Apply the heatsinks to the Pi.
- Mount the Pi into the case with the provided screws.
- Attach the MMDVM hat to the top of the Pi.
- Attach the two UHF antennas.
- Using snips, remove the portions of the case cover that would interfere with the antennas or the screen.
- Using two of the provided screws that came with the case, attach the fan to the top of the case.
- Cut the leads then route the fan cable through one of the remaining slots beside the fan on the top of the case.
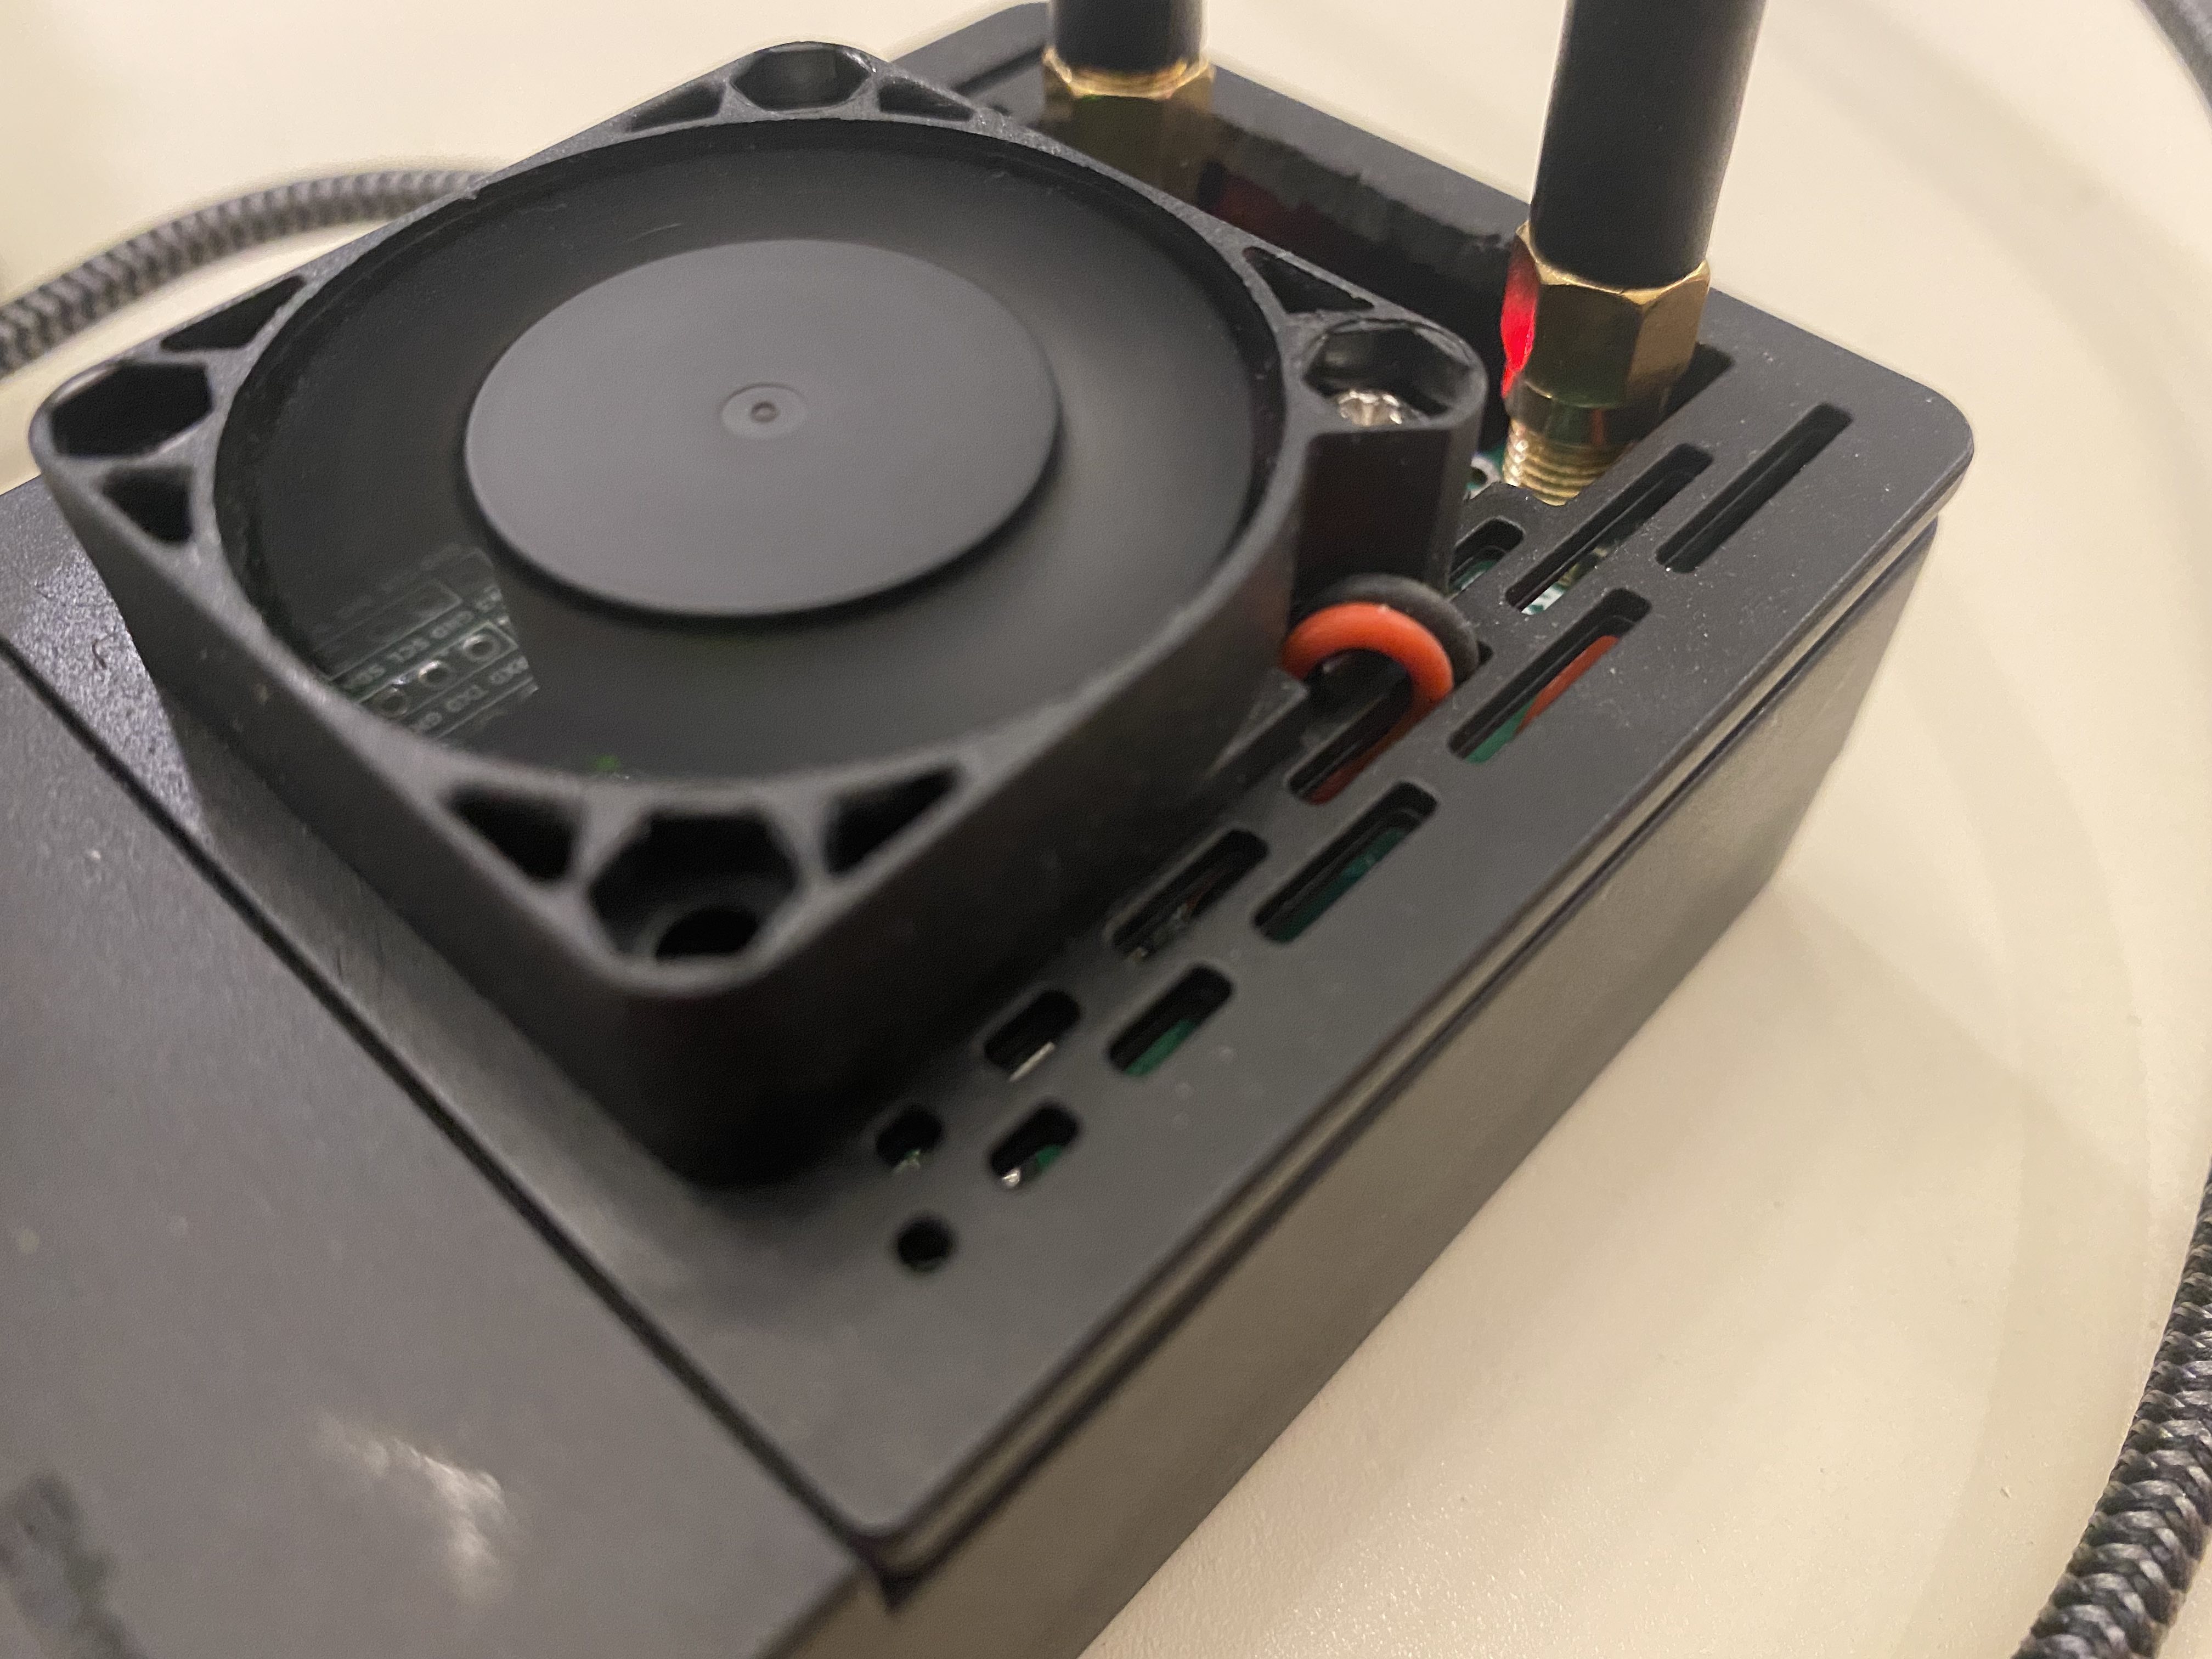
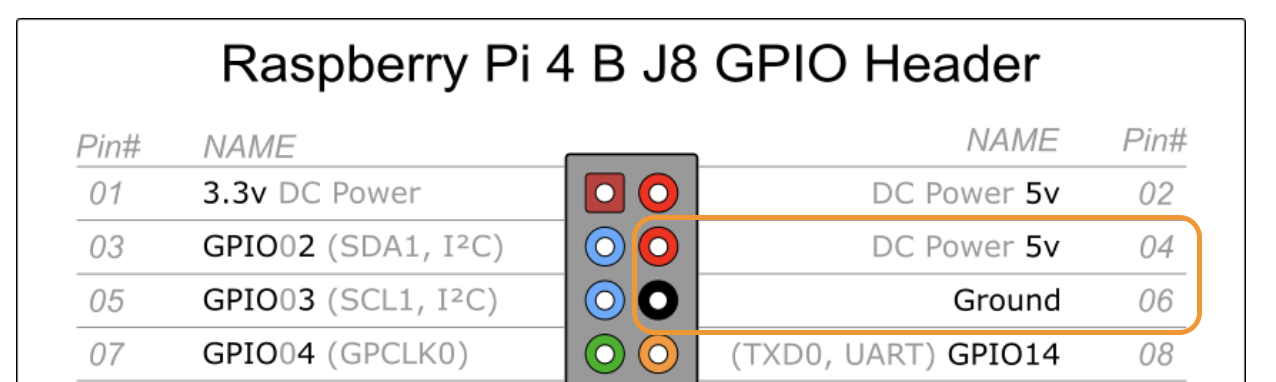
- Solder fan leads to 5V/Ground on the MMDVM Hat.
 - Install the top of the case.
Install pi-star
- Vist the pi-star download page and download the latest version with the
Pi-Star_RPi_prefix. At the time of writing this, it was Pi-Star_RPi_V4.1.5_21-Jun-2021.zip. - Write the image to your microSD with either balenaEtcher or the official [Raspberry Pi Imager](Raspberry Pi Imager.
- Configure WiFi with the pi-star WiFi Builder. Write this file to
wpa_supplicant.confon the boot volume of the microSD. On macOS, the following command should work:cp Downloads/wpa_supplicant.conf /Volumes/boot/wpa_supplicant.conf
Configure pi-star
Basic configuration
- Upon first boot (and after some time), the Pi will connect to WiFi and will available via pi-star.local
- Login to the configuration page using the username
pi-starand the passwordraspberry. Change the password via theRemote Access Passwordsection at the bottom of the page. Changing the password will require you to log back in. - Under
Control Softwareset Controller Mode toDuplex Repeater (or Half-Duplex on Hotspots)and apply the changes. - Enable DMR Mode under
MMDVMHost Configurationand set MMDVM Display Type toOLED Type 3. Apply the changes. - Under
General Configurationset all of the following, then apply changes:- Hostname (optional) - change it to the hostname you prefer. You will be able to reach this by adding .local to the end.
- Node Callsign - set to your callsign.
- Radio Frequency RX/TX - pick frequencies that aren't associated with a repeater or hotspot near you. Most hotspots only come with UHF antennas so pick a frequency in the apprropriate band.
- Latitude/Longitude - Use Google Maps to figure this out.
- Town - Add your town followed by your locator/grid square (available on your QRZ page).
- Country - Add your country (e.g. USA).
- URL - If you want it to use your callsign's QRZ page, select
Auto, otherwise selectManualand populate the url with the url of your choice. - Radio/Modem Type - Choose
STM32-DVM / MMDVM_HS - Raspberry Pi Hat (GPIO). - Node Type - Select
Public. - APRS Host Enable - Enable.
- APRS Host - Choose the host that is appropriate for your location (e.g.
noam.aprs2.net). - System Time Zone - Don't change
UTC. - Dashboard Language - Choose the apropriate language (e.g.
english_us).
- You will now get a warning about the hotspot being in public mode without an access list. Add your DMR ID to the DMR Access List and apply the changes.
- Under
DMR Configurationset all of the following, then apply changes:- DMR Master - Select the BrandMeister master of your choice (e.g.
BM_3104_United_States). - DMR ESSID - Because later versions of DMRGateway have stronger opinions about this, I chose to set this to
01for my first hotspot. - DMR Color Code - Pick the CC you prefer.
- DMR Master - Select the BrandMeister master of your choice (e.g.
- You will now see Hotspot Security under
DMR Configuration. Insert your hotspot password and apply the change. - Under
Firewall Configurationchange uPNP toOffas this isn't needed for DMR. - Click on Configure WiFi under
Wireless Configuration. Add the details for your phone's hotspot network and save the changes. - Set the PSK for the
Auto APnear the bottom of the page.
Advanced Configuration
- Set you Brandmeister API key here. Your BM API Key can be generated here.
- Set your callsign and enable PiStar-Remote.
Update Pi-Star
Login via SSH and run the following command:
sudo pistar-update
Upgrade MMDVM Firmware
The latest version of the MMDVM HS_Hat firmware at the time of this writing is 1.5.2.
To upgrade the firmware, perform the following:
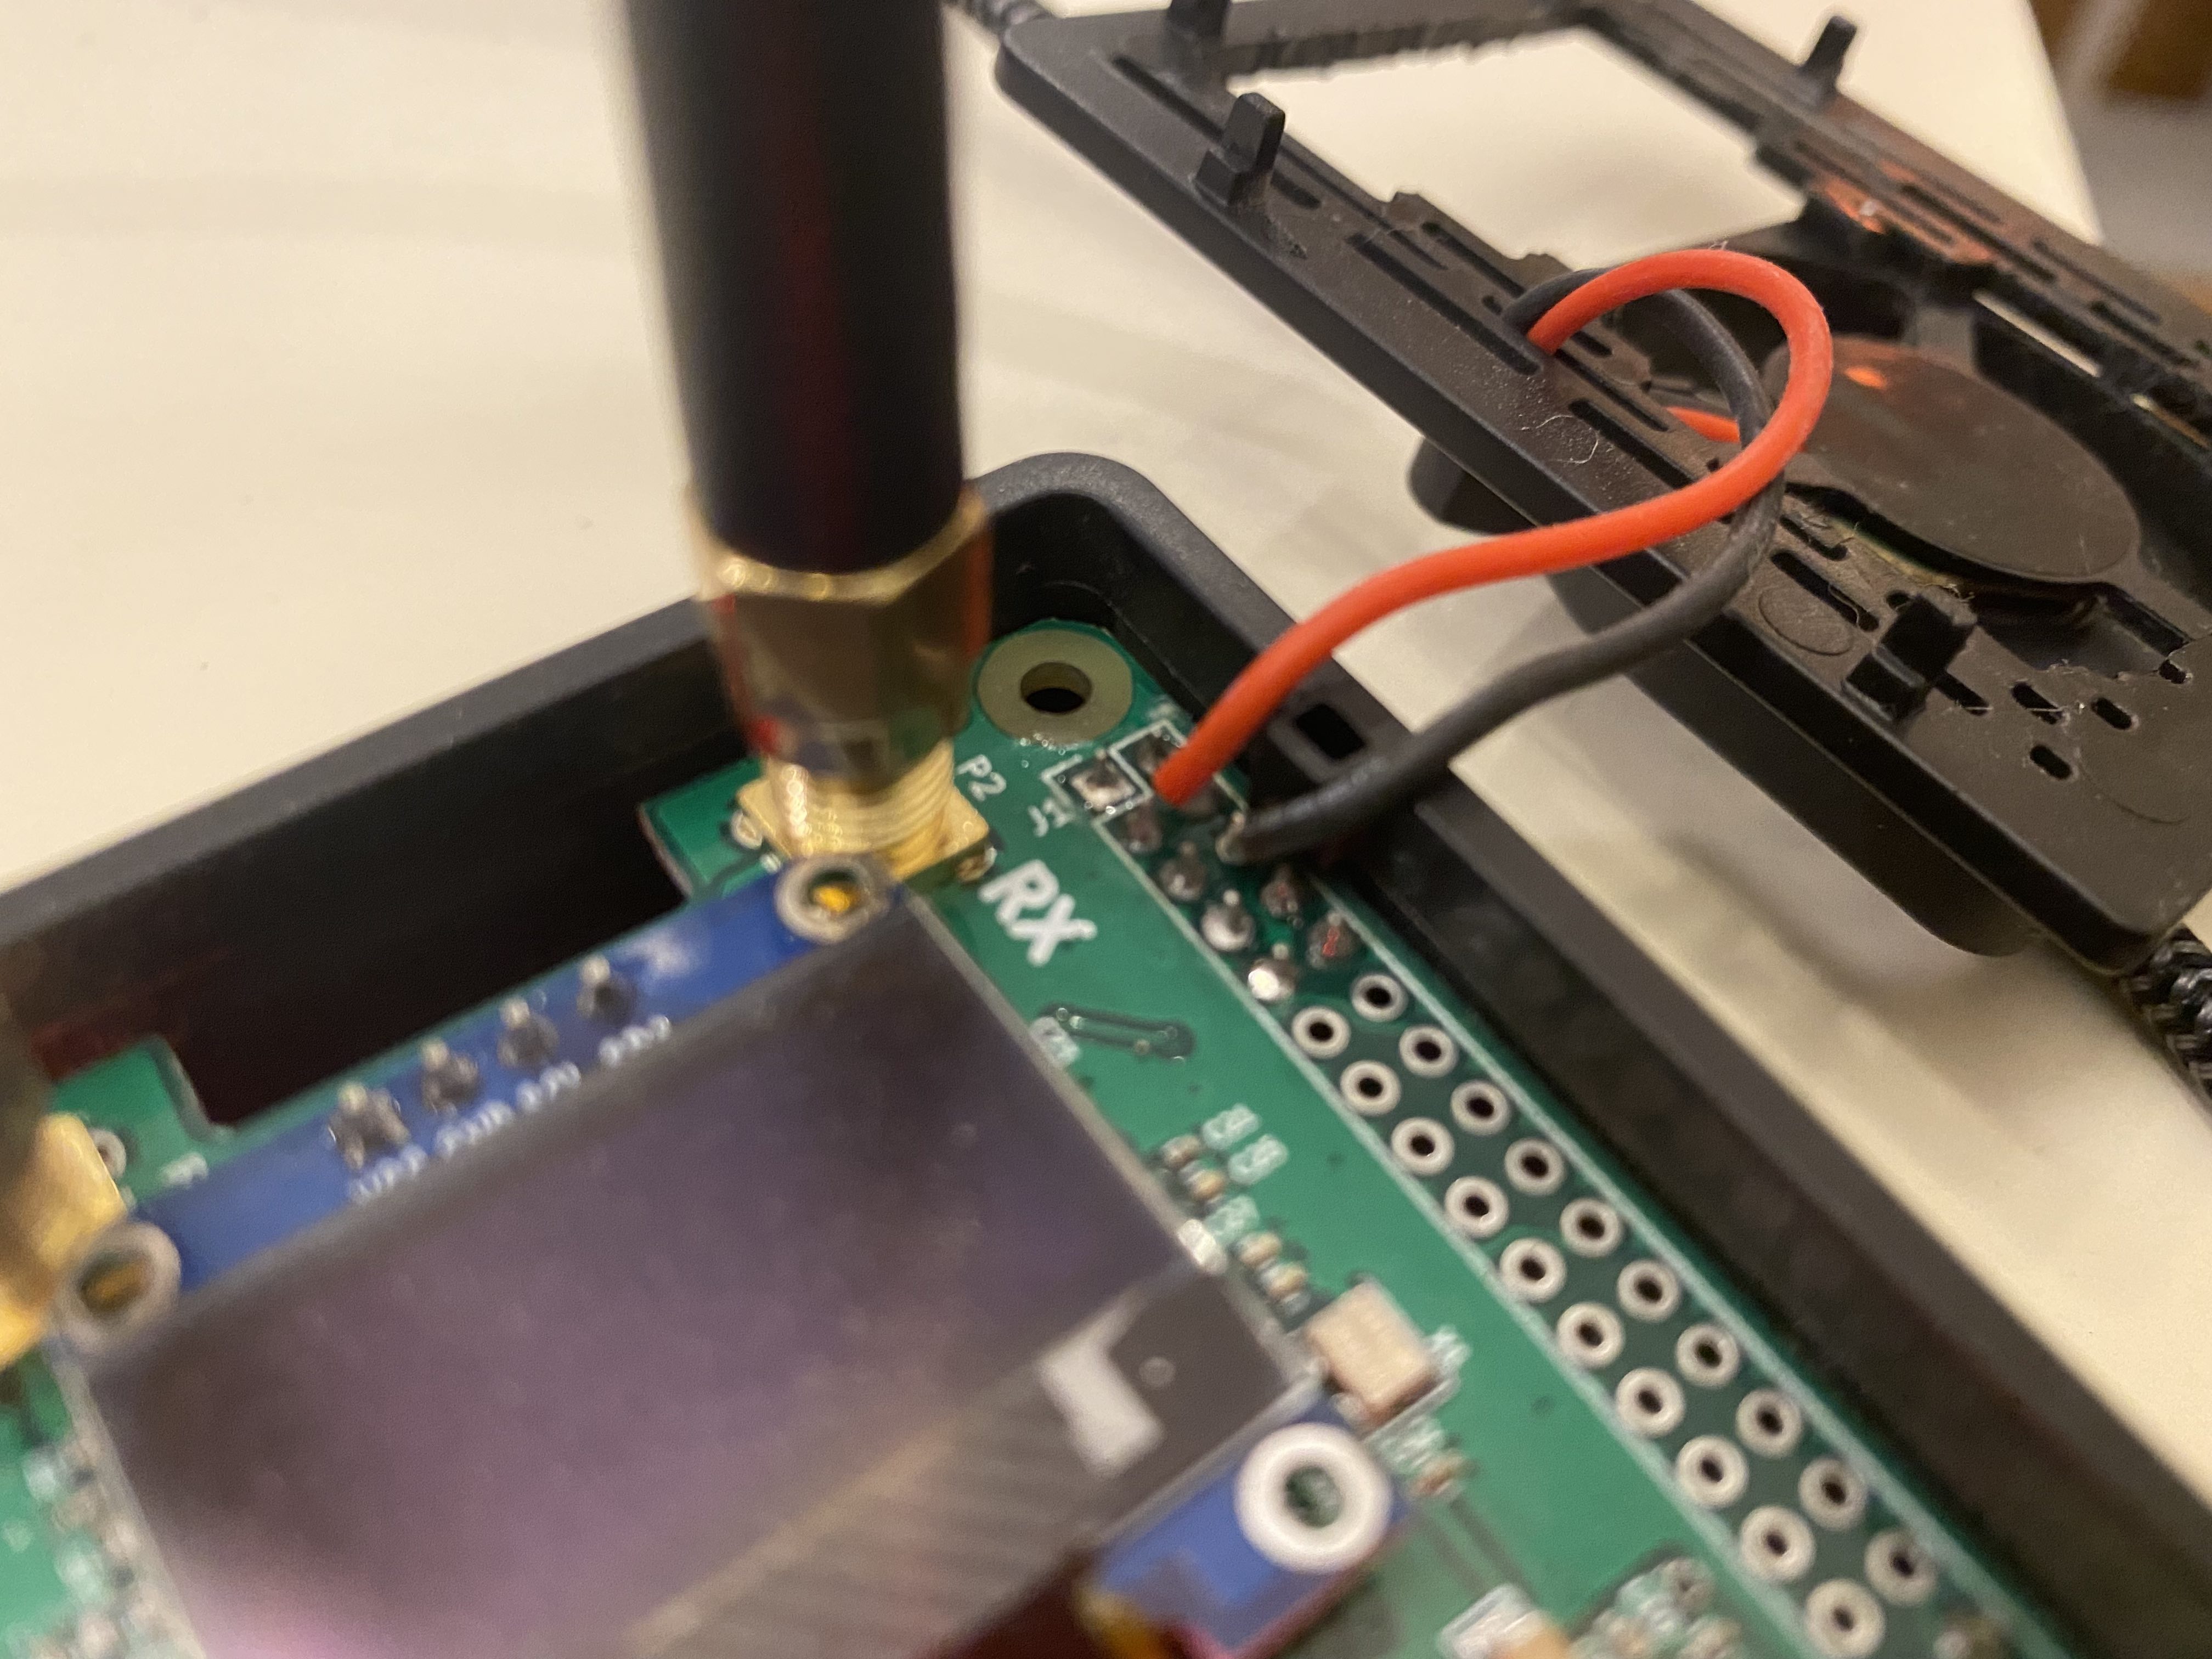
- Jumper BOOT0 (center to +) and solder a bridge on JP1
-
Run the following at the terminal on the Pi:
sudo pistar-mmdvmhshatflash hs_dual_hat -
After upgrade, remove solder bridge from JP1.
- Remove BOOT0 jumper (optional).